Aluminum radiators are known for their efficiency and durability, but like any mechanical system, they can develop issues.
Whether it’s leaks, blockages, or reduced performance, knowing how to repair your aluminum radiator can save you time and money.
In this guide, we’ll explore common problems and provide a step-by-step process for repairing them.
How to repair an aluminum radiator?
Aluminum radiator repairs often involve sealing leaks with a special epoxy or patch. For more serious issues, welding or replacement might be necessary. Always consult a pro for the best solution.
Key Takeaways
- Aluminum radiators can develop leaks, blockages, or corrosion over time.
- Regular maintenance can help extend the life of your radiator.
- Basic tools and materials are often enough for repairing small issues.
Understanding Common Issues with Aluminum Radiators
Before diving into the repair process, it’s important to understand the common problems that can arise with aluminum radiators.
Identifying the issue will help you choose the right approach for fixing it. Here are a few common issues you might encounter:
1. Leaks
Leaks are one of the most common problems with aluminum radiators.
They can occur at the seams or from small holes in the radiator itself. Leaks often result from corrosion, age, or physical damage.
A small leak might seem minor, but it can cause significant issues if left unattended, leading to inefficient heating and potential water damage.
2. Clogs or Blockages
Over time, sediment, mineral deposits, or air can build up inside the radiator, blocking the flow of coolant.
This can cause the radiator to heat unevenly or stop heating altogether. Clogs can lead to reduced efficiency, which could impact the overall performance of your heating system.
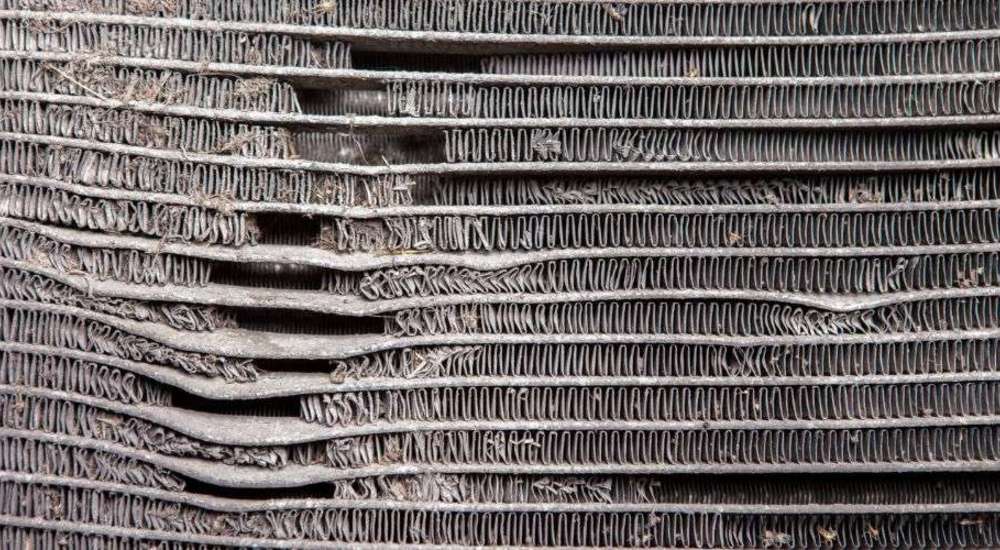
3. Corrosion
Aluminum radiators are generally resistant to rust, but over time, corrosion can still occur, especially in areas with hard water.
Corrosion can weaken the structure of the radiator and lead to leaks or blockages. It’s essential to monitor for any signs of corrosion to prevent more serious issues.
Step-by-Step Guide to Repairing an Aluminum Radiator
Now that we’ve identified some common issues, let’s shift gears and explore repair options, especially if your vehicle’s electrical problems are pointing to something more specific, like needing an alternator replacement in Monfort Heights.
Some repairs may be simple enough for DIY fixes, while others may require professional assistance. Below, we’ll walk through the steps for common radiator repairs.
Step 1: Turn Off the Heating System
Before you begin any repair work, make sure your heating system is completely turned off.
Allow the radiator to cool down to avoid burns or injury. If your radiator is part of a central heating system, turn off the boiler or central heating source to stop the circulation of hot water.
Tip: If your radiator is connected to a pressurised system, make sure the pressure is released before beginning repairs.
Step 2: Locate the Leak or Blockage
The next step is to identify where the leak, blockage, or corrosion is occurring. If the radiator is leaking, you might see water or coolant around the base of the radiator or along the seams.
If you suspect a blockage, feel for any cold spots on the radiator’s surface, which could indicate where the flow of coolant has been obstructed.
Tip: If you can’t locate the leak or blockage by sight, you can use a radiator pressure testing kit to detect small leaks.
Step 3: Repairing a Leak
If you’ve found a leak, there are a few methods for repairing it depending on the size and location of the damage:
Small Leaks: For small leaks, you can use a radiator leak sealant. These are specially designed products that can be added to your radiator system. Simply follow the instructions on the product to seal the leak.
Large Leaks: For larger leaks, you may need to remove the radiator and patch it. Clean the area around the leak and apply a metal epoxy or aluminum repair kit to the damaged area. Once the epoxy sets, you can reattach the radiator.
Tip: If the leak is near a joint or seam, you might need to disassemble part of the radiator to apply the sealant correctly.
Step 4: Unclogging the Radiator
If you suspect that a blockage is preventing your radiator from working effectively, the next step is to clear it out.
Start by bleeding the radiator to release any trapped air. You can use a radiator key to open the bleed valve and allow air to escape until water begins to flow steadily.
If this doesn’t resolve the issue, you may need to flush the radiator. Here’s how:
Step 1: Turn off the heating and allow the radiator to cool.
Step 2: Disconnect the radiator from the heating system.
Step 3: Use a hose to flush out the radiator. Attach the hose to one of the valves, and allow water to flow through the radiator to clear out any sediment or debris.
Step 4: Reconnect the radiator, ensuring the valves are tightened properly.
Tip: If flushing the radiator doesn’t clear the blockage, you may need to consult a professional to clean or replace internal parts.
Step 5: Addressing Corrosion
If corrosion has built up on your aluminum radiator, it may be necessary to remove it. For minor corrosion, you can clean the affected areas with a mixture of white vinegar and water.
Use a soft brush to scrub the area, but avoid using abrasive materials that could damage the surface.
For more severe corrosion, it may be best to have the radiator replaced or professionally refurbished.
Sometimes, the damage from corrosion can compromise the structural integrity of the radiator, making it unsafe for continued use.
Preventative Maintenance for Aluminum Radiators
Once you’ve repaired your aluminum radiator, it’s important to take steps to prevent future issues.
Regular maintenance can help extend the life of your radiator and keep it running efficiently. Here are a few tips to help maintain your radiator:
Clean Regularly: Regularly check and clean your radiator to prevent dirt and debris buildup. Make sure to bleed the radiator at least once a year to remove trapped air.
Check for Leaks: Periodically inspect the seals and valves for any signs of leakage. Address small leaks as soon as you notice them to prevent larger issues from developing.
Keep the Area Dry: Ensure that the area around the radiator is dry to prevent moisture buildup, which can cause corrosion.
If you live in an area with high humidity, consider using a dehumidifier in the room.
Frequently Asked Questions
1. How do I know if my radiator is leaking?
Look for water or coolant around the base of the radiator or along the seams. You might also notice a decrease in heating performance or water stains on the floor.
2. Can I repair my radiator myself?
Yes, many minor repairs can be done by homeowners, such as sealing small leaks or unclogging the radiator. For more serious issues, it’s best to call a professional.
3. How often should I clean my aluminum radiator?
It’s a good idea to clean your radiator once a year, particularly if you live in an area with hard water or a high amount of dust and debris.
Conclusion
Repairing an aluminum radiator doesn’t have to be a complicated task, but it does require the right tools and knowledge.
By following the steps outlined in this guide, you can address common issues like leaks, blockages, and corrosion, helping to extend the life of your radiator and keep it working efficiently.
Regular maintenance is key to preventing future problems, so make sure to check your radiator regularly and take care of any minor issues before they turn into costly repairs.
If you encounter a more complex issue, don’t hesitate to call a professional to ensure your radiator is functioning properly.